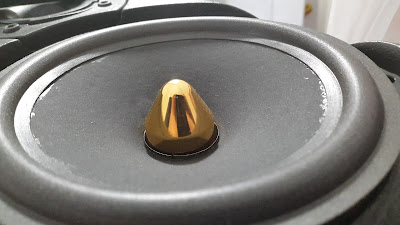
I recently brought a pair of Mission 772 speakers. They are old but they are gold. And they sit just perfect together with my set of Mission 782.
The problem is that age takes the toll on these babies, and the rubber from the speaker outer damper started to degrade.
One of the speakers shown a fatigue fracture... not only not good and with influence over sound quality (when operating and high levels), being this an open center design, this would mean unbalancing and, in time, total driver failure due to the coil rubbing the walls and erode till destruction.
A solution was needed, and I would not let these babies go because of a minor problem. So ebay to the rescue and, soon enough, a repair pack was underway.
Ok then, ready, set, go...
First step is to lay down the speaker and remove the screws.
Then use a small knife to start to unglue/separate the external border of the old bubber/foam damper. BE CAREFUL when pulling as the inner side is still glued in and too much lift will damage the speaker cone.
Then work on the inside, following the same rule: no excessive lift.
Here is an image of the removed cone and the damage on the rubber damper.
It's an excellent time to inspect the main damper spring inside the driver showing in yellow. This one was just perfect.
As materials evolved, so did the design. You can compare the thickness of the rubber vs the replacement foam damper.
This is good news and bad news at the same time: good because less weight and the same tenacity will mean less moving weight and a better response....the bad news is that the heavier rubber would hold the cone I place better during centering and reassembly...so more work for me.
The glue. The glue is another problem:
You want enough blue to hold this in place...but not too much as is will add weight... and just enough to glue fast, but not too fast so you can move and place the damper properly and within geometry.
So the solution I to apply only to the inside, and apply an almost transparent amount of glue on both the edge of the cone and the edge of the foam damper.
Then you marry the 2 parts together and, while HOLDING the cone with one finger, lift and place the foam on the cone...this will enable the glue to catch some air and react a little faster.
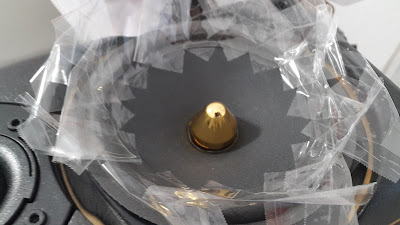
The material will try to counter the glue and the more surface you glue in, the more it will fight back.. SO, my recommendation is to grab gum tape, twist it into a rounded surface that will match the cone surface... and start fixing it in a cross pattern (top, bottom, side, side).
This is the final LOOK :)
Allow it to glue in... time for coffee, and a movie or two. I let the glue set in for half a day... it's not really a contact glue (rather looks like wood glue, actually). So it does take some time to set properly.
50% through... not it's time for the outer part.
The outer part is A LOT simpler... but not linear.
Glue wise, just slightly lift the foam and pass the glue without worrying too much about the amount of glue... it's a fixed part so no weight to influence motion.
HOWEVER, this is an open cone design.. it is set this way to allow better movement on the cone and consequently a better response, but this means that there is also some fluctuation of the cone and the entire coil assembly. IF that fluctuation means the coil rubs the side of the wall containing the magnet, it will rub the varnish out and then short circuit the coil... and eventually just completely wear it out until it looses continuity.
So after you set the glue on the outside, and before it sets, just move the come up and down, while adjusting the damper outside. You will feel free movement, or a slight vibration, created by the coil rubbing the walls.
Again, you can have gum-tape (this time a simple cross is enough), and adjust until movement is free, I do recommend you bias the setting a bit towards the upper side of the speaker, so that when standing, the small but existing weight will auto-balance.
Again the glue set in... a day should be enough. And then screw the driver back in... connect your speaker and... well it's a speaker, you know what to do with it :)
on the left you have the repaired one, the original (yet to be repaired) is on the right.
The speakers sound better with the new damper. Weight does influence moving parts... inertia, you know?


No comments:
Post a Comment